⚡️⚡️⚡️Lightning ⚡️⚡️⚡️
Whenever you create a channel with Fully Noded via c-lightning it will automatically use the active onchain Fully Noded wallet to fund the channel and to close to!
Whenever you create a channel with Fully Noded via LND it will automatically close to the active onchain Fully Noded wallet! Funding from the Fully Noded wallet for LND is coming soon.
In order for Fully Noded to recognize your node as a lightning node you must set the port to 8080 (this is the default).
In order for Fully Noded to recognize your node as LND you must have a macaroon in the node details (lndconnect always has a macaroon).
LND
To connect your LND node find the onion (Tor) REST based lndconnect QR code in your nodes settings.
In Fully Noded go to “Settings” > “Node Manger” > “scan QR”. Thats it. You can also add the credentials manually.
C-Lightning
The remainder of this document explains how to use Fully Noded to remotely connect to and control your c-lightning node via a Tor V3 hidden service.
TLDR
You need an http server that exposes the lightning-rpc unix domain socket to a port which you must expose to a Tor V3 hidden service.
Add the hostname jeifeif.onion:port to Fully Noded > Node Manager > ⚡️ along with the http user and http password you configure with the http server. Thats it. In this guide we use https://github.com/Start9Labs/c-lightning-http-plugin, there are others, feel free to try whatever works for you.
Security
You should take advanatge of Tor V3 auth by exporting the V3 authentication key from Fully Noded > Settings > Security Center > Tor V3 Authentication and add the pubkey to your lightning-rpc HiddenServiceDir authorized_clients.
You should disable allowing any incoming connections to the lightning-rpc port and only allow localhost to access it. Following these suggestions will go a very long way in ensuring your remote connection to your lightning node is secure.
Step by step
First you need to install c-lightning, to do that follow this guide for whichever OS you are on.
If you have c-lightning running already you can stop it. cli/lightning-cli stop
Install and configure Tor
Pick the guide below for the device your’re running your node on:
Create lightning config
If you haven’t created a lightning config file now is a good time to do that.
cd /home/you/.lightning
nano config
paste in the following config which is ideally suited to Fully Noded usage:
alias=FullyNoded
network=testnet
log-file=/home/you/.lightning/lightning.log
plugin=/home/you/.lightning/plugins/c-lightning-http-plugin/target/release/c-lightning-http-plugin
log-level=debug:plugin
http-pass=aPasswordYouWillSoonCreate
Create the log file
mkdir /home/you/.lightning/lightning.log
Setup c-lightning-http-plugin
Create a directory for the plugins we need:
mkdir /home/you/.lightning/plugins/
cd /home/you/.lightning/plugins/
Download the plugin:
git clone https://github.com/Start9Labs/c-lightning-http-plugin.git
Install Rust:
curl --proto '=https' --tlsv1.2 -sSf https://sh.rustup.rs | sh
Close the terminal and reopen it so that the Rust command cargo is automatically added to your path
Build the plugin:
cd /home/you/.lightning/plugins/c-lightning-http-plugin
cargo build --release
When it finishes building give it permissions:
chmod a+x /home/you/.lightning/plugins/c-lightning-http-plugin/target/release/c-lightning-http-plugin
Start lightningd
Start lightning:
cd /home/you/lightning
lightningd --conf=/home/you/.lightning/config
Connect Fully Noded
In Fully Noded go to “Settings” > “Node Manager” > +, from there you will be automatically prompted to add a node:
- add a label
- add the rpc user:
lightning - add the rpc password which is the
http-passyou added to the config from above:aPasswordYouWillSoonCreate - add the onion address (hostname) we created earlier, ensure you add the port at the end:
theHostnameYouJustSavedFromThePreviousSteps.onion:1312 - ignore the macaroon and cert as that is for LND only
Thats it, Fully Noded will now automatically use those credentials for any lightning related functionality. You can only have one lightning node at a a time, to add a new one just overwrite the existing credentials.
In Fully Noded you will see lightning bolt ⚡️ buttons in a few places, tap them to see what they do.
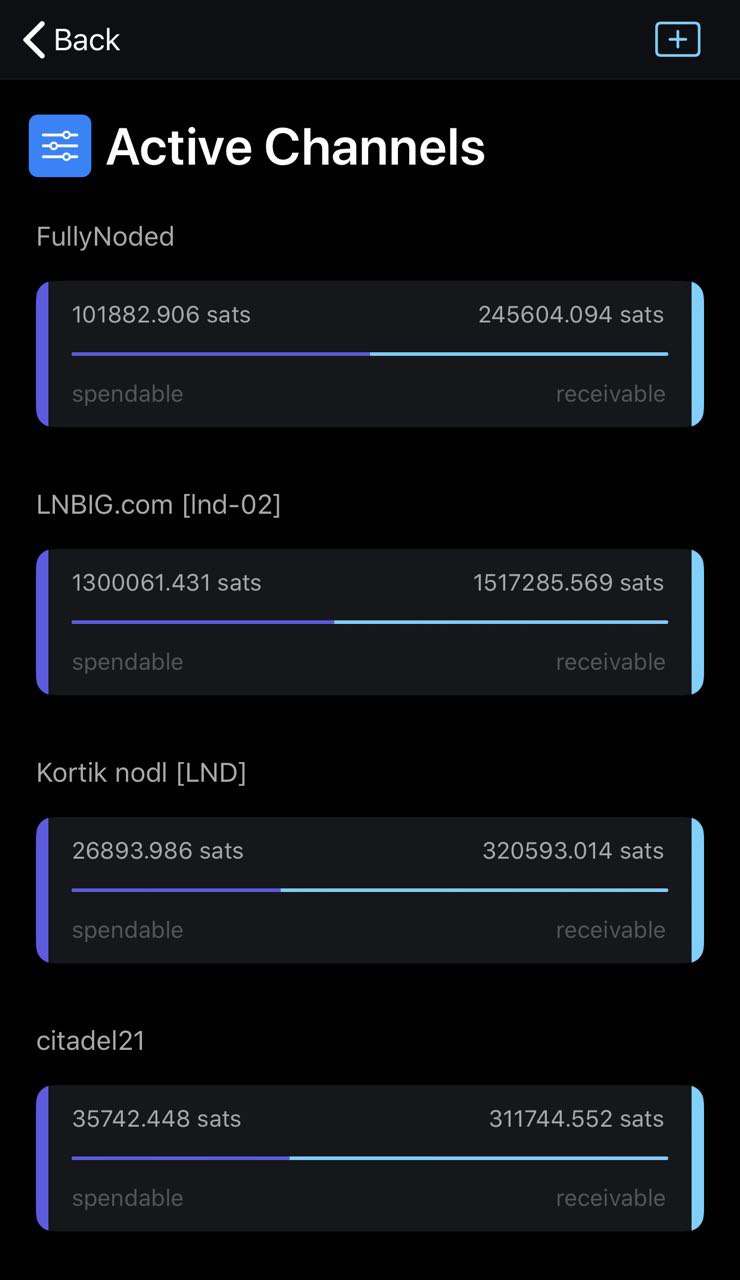
From v0.1.72 FN has a nice new visualization for your active lightning channels and a lightning button from home node view to access your lightning node
 </a>
</a>
Invoices
For invoices, Fully Noded by default creates on-chain invoice’s from your Bitcoin Core node, tap the lightning bolt to create a lightning invoice, you can add optional amount (btc) and label for the bolt11 invoices.
Balances
Balances shows an on-chain 🔗 and lightning ⚡️ balance.
Transaction history
The transaction history will automatically show any lightning related on-chain transactions (deposits/withdraws to your lightning wallet) as well as your Bitcoin Core wallet’s on-chain transaction.
Any lightning related transaction will have a ⚡️ icon and any on-chain transactions will have a 🔗 icon, you will see funding and withdraw transactions with both a ⚡️ and 🔗icon because they are related to both your on-chain and lightning wallet. On-chain transactions are always denominated in btc, off-chain transactions always denominated in sats.
Sending transactions
On the “send” view you will see some new lightning ⚡️ buttons.
Deposit to your lightning wallet
Just above the address text input field there is a lightning ⚡️button, this will fetch a deposit address from your lightning node so you can easily deposit to it from your on-chain node’s wallet.
Withdraw from lightning wallet
There is a lightning ⚡️in the top right too, that is for withdrawing from your lightning node to whatever address you provide, amounts will be denominated in btc or USD depending on which currency you have selected (you can tap the coin button to toggle currency types).
Paying invoices
In this view you can always paste in or scan a bolt11 invoice with an optional amount filled in, if the bolt11 invoice does not specify an amount you must fill one out in the amount input text field.
Channel management
For creating channels go to “Home” > ⚡️ (top left button) > “Active channels” > + (top right button):
You can tap the + button to scan a QR (that consists of
Add an amount in satoshi’s which you want to to commit to the channel.
Scanning a valid node uri or pubkey will trigger a series of calls:
- we establish a connection to the peer
- create a channel
- fund the channel from your active on-chain Fully Noded wallet
If you use cold storage you will be presented with a psbt.
Export it, and sign it.
⚠️ To avoid possible loss of funds it is important that you broadcast the signed raw transaction with Fully Noded!
Upload the signed raw transaction (or signed psbt) to Fully Noded to complete the channel funding. The transaction will not be broadcast unless the funding completes successfully, if you broadcast the transaction outside of Fully Noded there is a chance of loss of funds!
FN will automatically recognize the transaction as the one you last created a channel with, when you tap “send” FN will issue the fundchannel_complete command and wait for it to succeed. If it fails the transaction will not be broadcast.
From the c-lightning docs:
“Note that the funding transaction MUST NOT be broadcast until after channel establishment has been successfully completed, as the commitment transactions for this channel are not secured until this command successfully completes. Broadcasting transaction before can lead to unrecoverable loss of funds.”
If all goes well you will get a success message, if not you’ll get an error.
Channels always close to the active on-chain Fully Noded wallet.
Rebalancing
C-lightning users must have the rebalnce.py plugin installed. Just tap the channel you want to rebalance.